Register a Validator in the Chain
This guide will walk you through the process of registering your validator node in the Hippius blockchain.
Prerequisites
Before proceeding, ensure you have:
- A fully configured validator node
- Required tokens for registration
Steps to Register Your Validator
Step 1: Register Your Node in the Blockchain
-
Navigate to Polkadot.js Apps for Hippius
-
Fill the form as shown in the image below with your Hippius node ID and the other required registration fields:
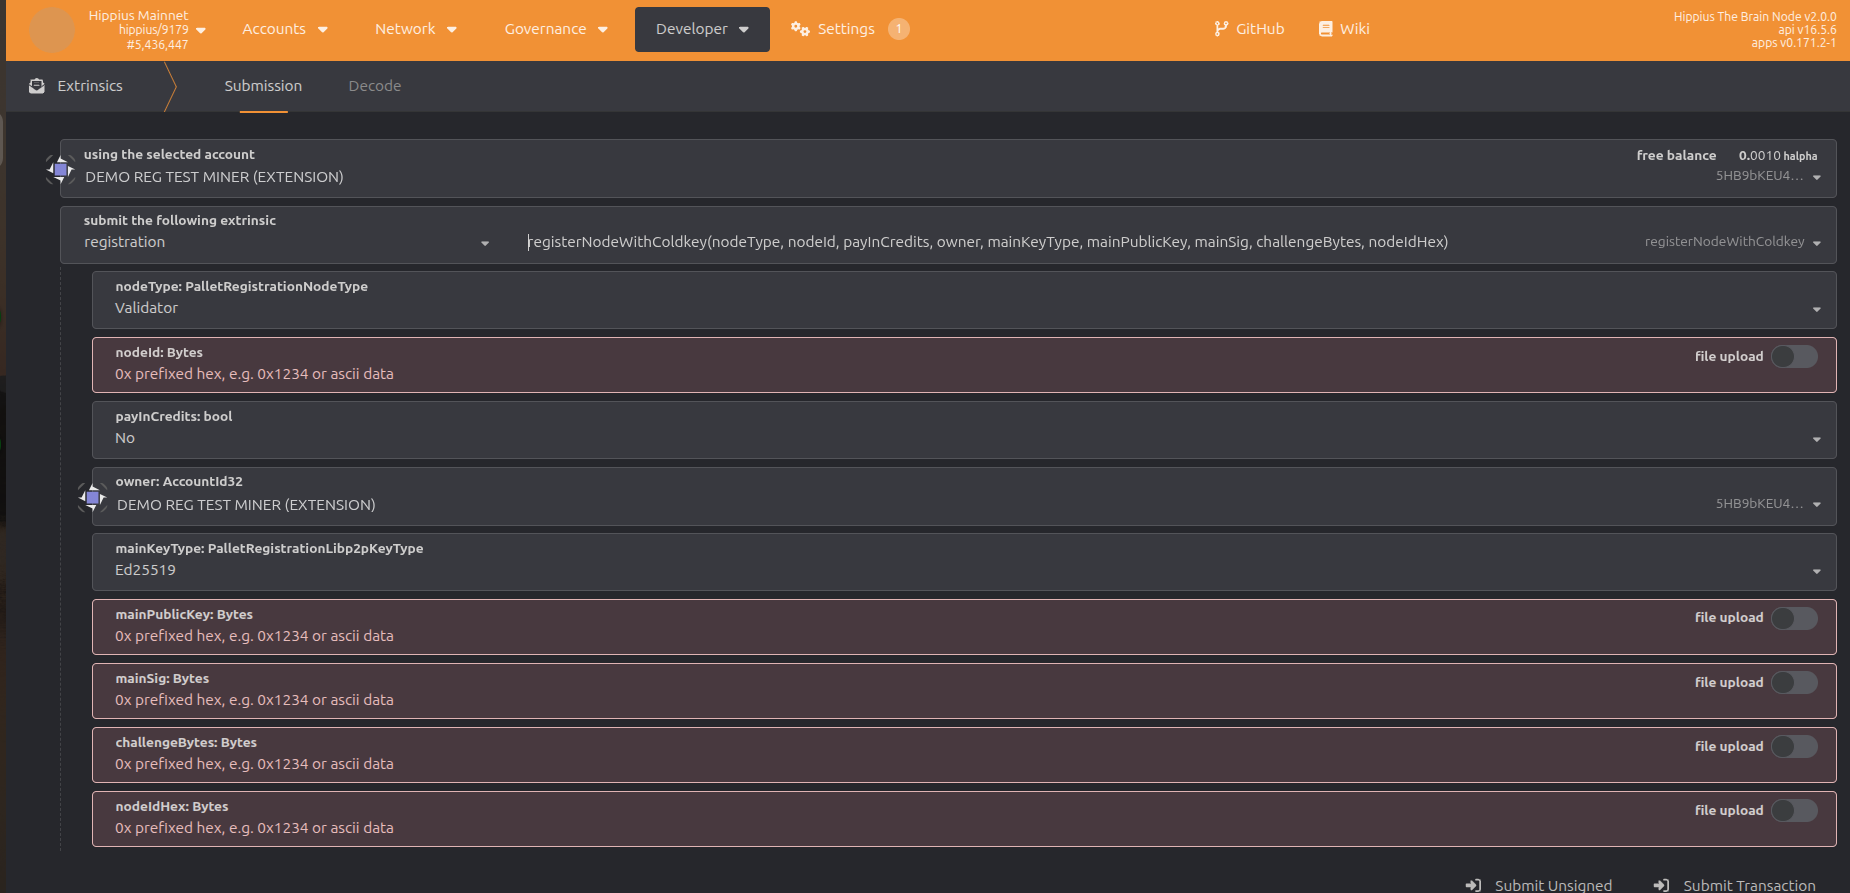
Submitting registerNodeWithColdkey from Polkadot.js Apps means filling challengeBytes, signatures, and related fields by hand. For a simpler flow, use the Hippius CLI (and related SDK-style tooling): see Hippius CLI & SDK and the commands in Registering in the Hippius Blockchain — for validators, pass --node-type Validator.
Where we explain how coldkey (main) node registration fits into the Hippius setup and where to go next for the full on-chain registration process, see Running a Hippius blockchain node — Section 4: Register your node on-chain.
Step 2: Generate Session Keys
- Get the session key for your validator node by running this command on your validator:
curl -H "Content-Type: application/json" -d '{"id":1, "jsonrpc":"2.0", "method": "author_rotateKeys", "params":[]}' http://localhost:9944
- Save and keep the session key safe for the next step.
Step 3: Register for Staking
Now that your validator is registered to submit weight on the Bittensor network and the session key is ready, you need to register in the staking page:
-
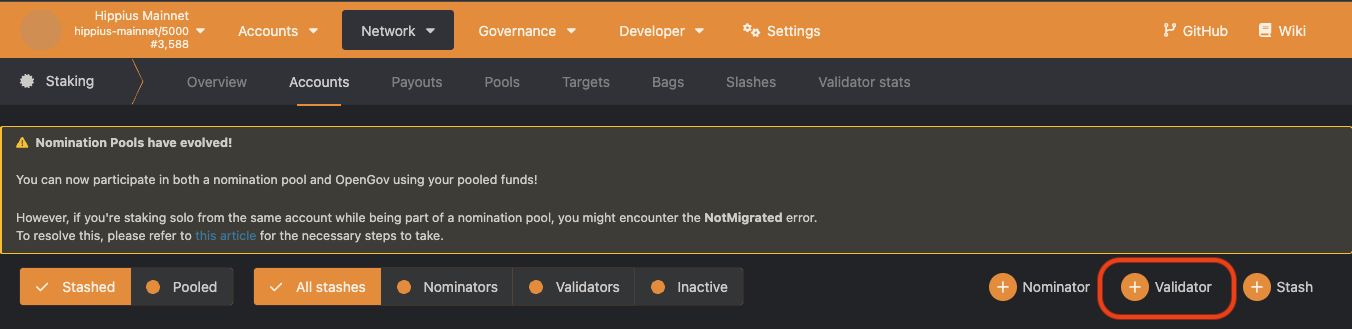
Click the "+ Validator" button:
-
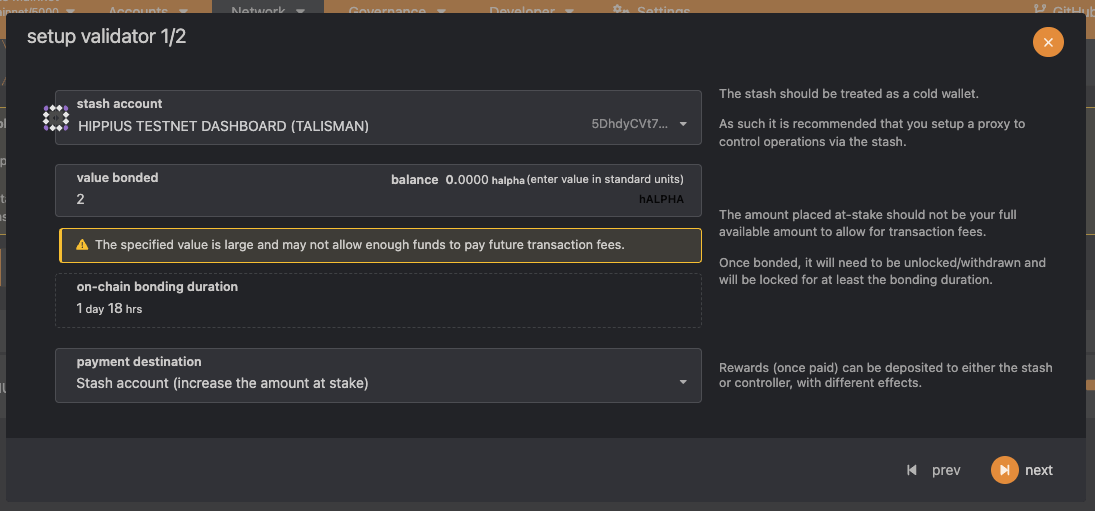
Bond a value (for example, 2 hALPHA - you can add more later):
-
Click "Next"
-
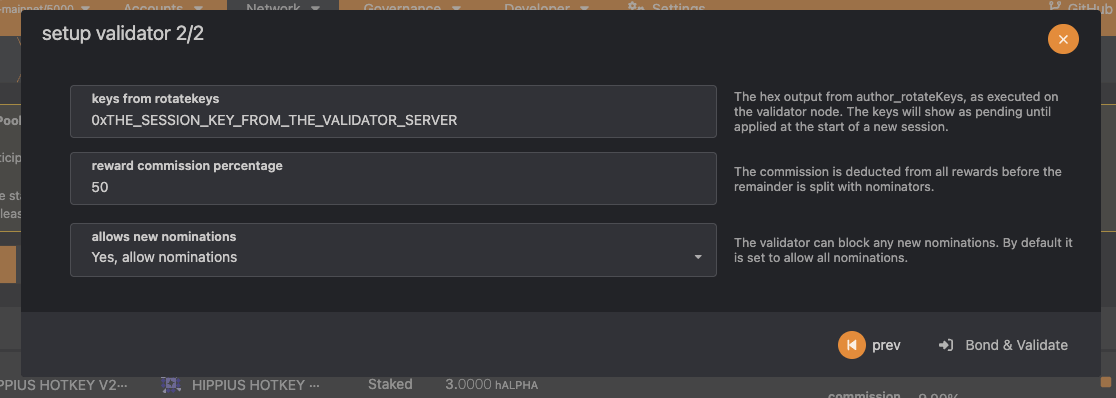
On the SetupValidator 2/2 page, enter the session key you obtained from your server:
-
Click on the "Bond & Validate" button.
Step 4: Verify Registration
You should now be able to see your validator in the staking page as "waiting for the next session."
Next Steps
After your validator is registered:
- Monitor its status regularly
- Ensure your node remains online and properly synced
- Consider setting up monitoring alerts for your validator